So I decided to make some robot art, and I hope that you like it 🙂 it’s all done in sketchup


So I decided to make some robot art, and I hope that you like it 🙂 it’s all done in sketchup
Hey guys!
It really has been a long time since my last post, and I’ve done quite a bit, so I’m going to start my return to blogging with the mostly finished set of parts that I have designed for the FIRST Tech Challenge, the robotics competition for students.

All the parts on display
These parts are designed in Sketchup and Printed at Shapeways. They attach NXT motors and sensors to tetrix pieces in a secure and simple fashion. I’m going to try to market them next season, but for now, they will remain an unknown piece waiting to be used O.O
The next post will be a comprehensive look at Sheila, my FTC Robot.
Have a good day!

 In FTC, many teams don’t use LEGO motors in their robots. They’re hard to configure with parts, and teams usually don’t like the idea of making LEGO Structures. However, LEGO motors are arguably very powerful. They only have 50 N-cm of torque, which makes them slightly weaker than the HS 485HB standard 180 degree servos (which have 60 N-cm of torque). However, they are significantly more controllable, can rotate continually, have advanced built-inencoders, and have an incredible set of functions in RobotC (I’ll list all their advantages in a later post). I personally think that they are an untapped asset, and as FTC becomes

more advanced, I think that they will take on a role as the go-to motor for precision movement (yes, even over regular and quarter-scale servos).

I then sent them off to Shapeways, where the Shapeways team 3D printed the models in Plastic. I just got them, and they turned out nicely, but they are certainly not perfect.
I tested two types of LEGO connections. The first type was a replica of the LEGO connectors, which I used for the motor mount. I measured them out and tried to imitate them. I was skeptical that these were going to work, so I also made a second type of connector, which I used for the pivot arm.  The LEGO connection, to my surprise, actually worked pretty well. Until I tried to take it off. The tubes were slightly too wide, so when I went to take them off, it was very difficult.
However, the other connectors worked splendidly. They are easy to put on and take off, but they stay on pretty well. Keep in mind that I will have places for screws built into the pieces. The screws will make the solid connections that are required for rigid bonds between the NXT motors and their mounts..

Aside from the connections, most of the other things went very well. I have a few small things that I will change because I’m particular, but I only have one other real issue: structural stability.
The designs and shapes of these objects are all well and good, but they need to withstand some brutal treatment, but stay within a reasonable price. I will, of course, offer them in stainless steel and other metals, but I do need to make them very strong in plastic form. I’m going to do most of this strengthening with the addition of corners on many of the edges. These additions will make the pieces more expensive, but they will probably increase the strength significantly. (I may also have a high strength plastic option)
For my next phase of prototyping, I will print an improved pivot arm in a polished plastic. I just want to see how the polish plastic feels and if it works well. I’m using the pivot arm for the test because it is almost finished, and the only improvements it needs are the strength augmentations. I will be printing a second motor mount with different dimensions and my custom attachments instead of the LEGO inspired attachments. Finally, I will be printing a mount for sensors. This is going to be pretty small, but it will probably pay off.
Hopefully, round #2 of prototyping will be equally as satisfying and successful!
Sheila, my robotics team’s robot (My team is 3886 Quake), is a multitalented robot that has developed over time. I like to keep a running log of 3D model renders to show the progress of Sheila. They are all modeled with Sketchup and rendered in Render[in]. Sheila competes in the FIRST Tech Challenge. Here are the pictures!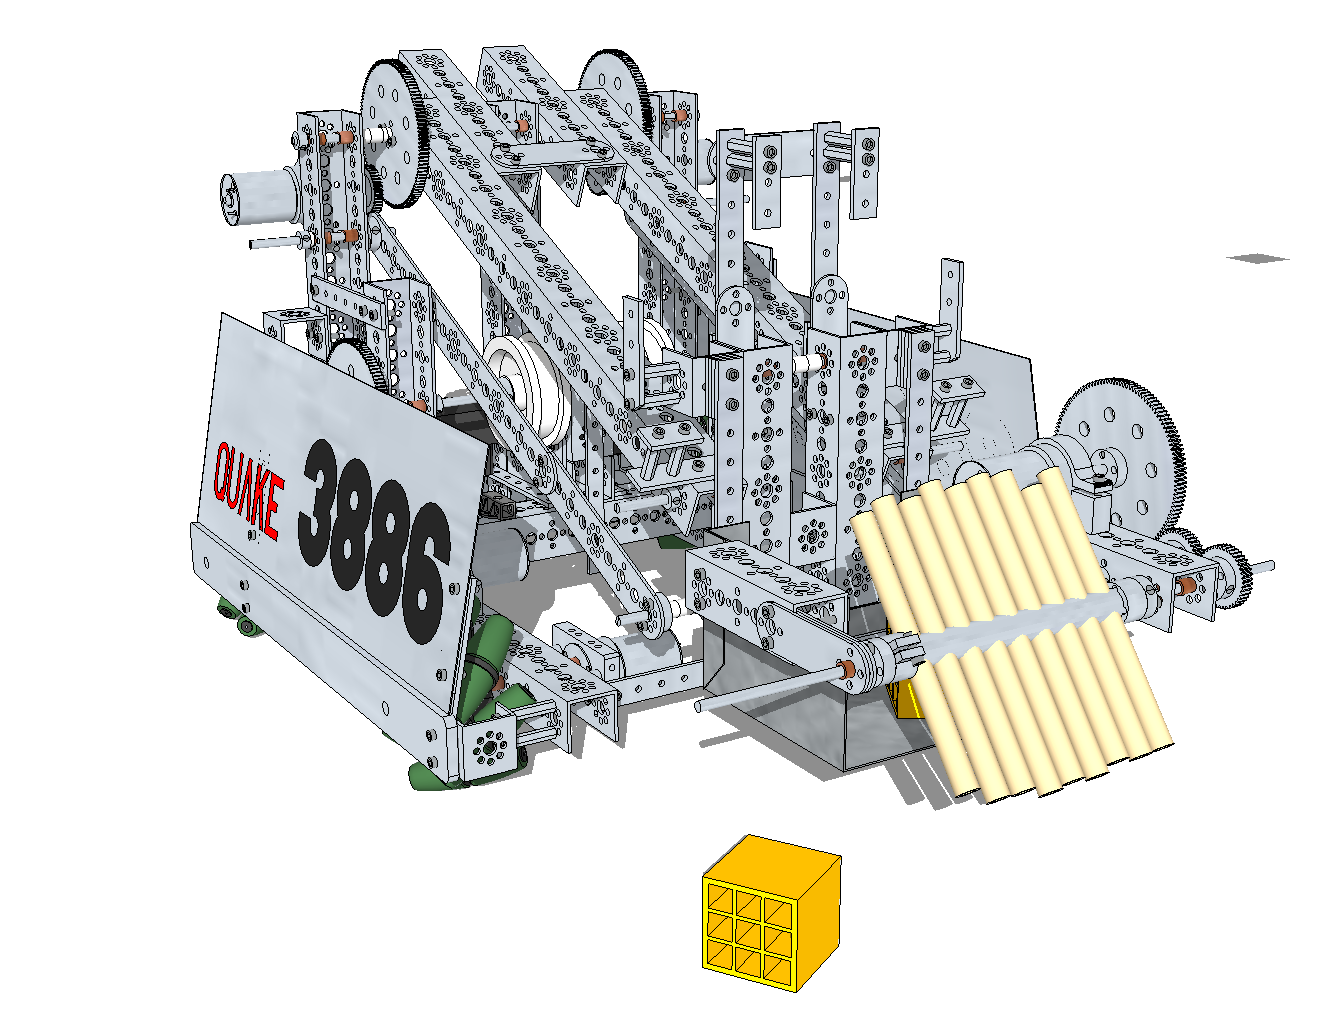


I came up with these beach huts after a trip to the bahamas. There were great beverage stands inside these little huts and I was completely obsessed. I took the concept one step further and made these guys. This is a public space that has a small refreshment stand in one of the huts.
Have a good day!

Caterpillar actually wasn’t inspired by a caterpillar. Instead, I looked at buildings and realized that many of them had slates that were parallel to the ground. I tried to come up with a building that had slates that were not parallel to the ground. After creating many designs, this is the one I decided to make.
The design for this building could go many directions. I decided to make it into a public space. However, it could be turned into a movie theatre or small museum.

Curve is an inner-city building that can by used for multiple purposes. It could be transformed into stores, apartments, offices, etc. Its strange walls are interesting and are sure to attract attention in any city. The building was made in Sketchup and rendered in render[in].
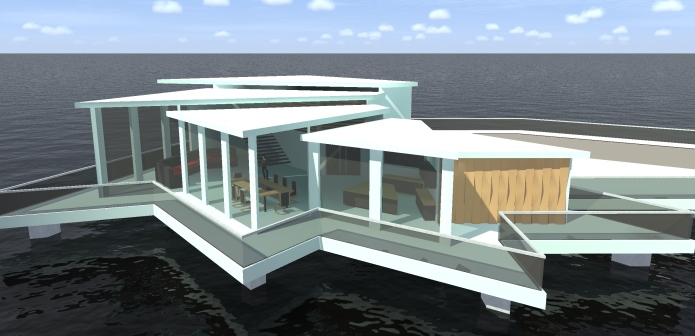
Buzz is a small single family home set on the water. Its inspiration comes from shells you find on a beach. I’ve been interested in architecture for quite a while and I love creating my better concepts in Sketchup. The fantastic images are produced by render[in], an image rendering plugin for Sketchup. It has a few glitches, but it works fairly well for my purposes.
